


These pretzel burger buns give you everything a good burger deserves: a chewy, deep golden crust with that unmistakable pretzel tang and a soft, pillowy inside sturdy enough to hold the juiciest patty without going soggy. Made with pantry staples and about two hours start to finish, most of that is hands-off rising time, they turn an ordinary weeknight burger or sandwiches into something special.
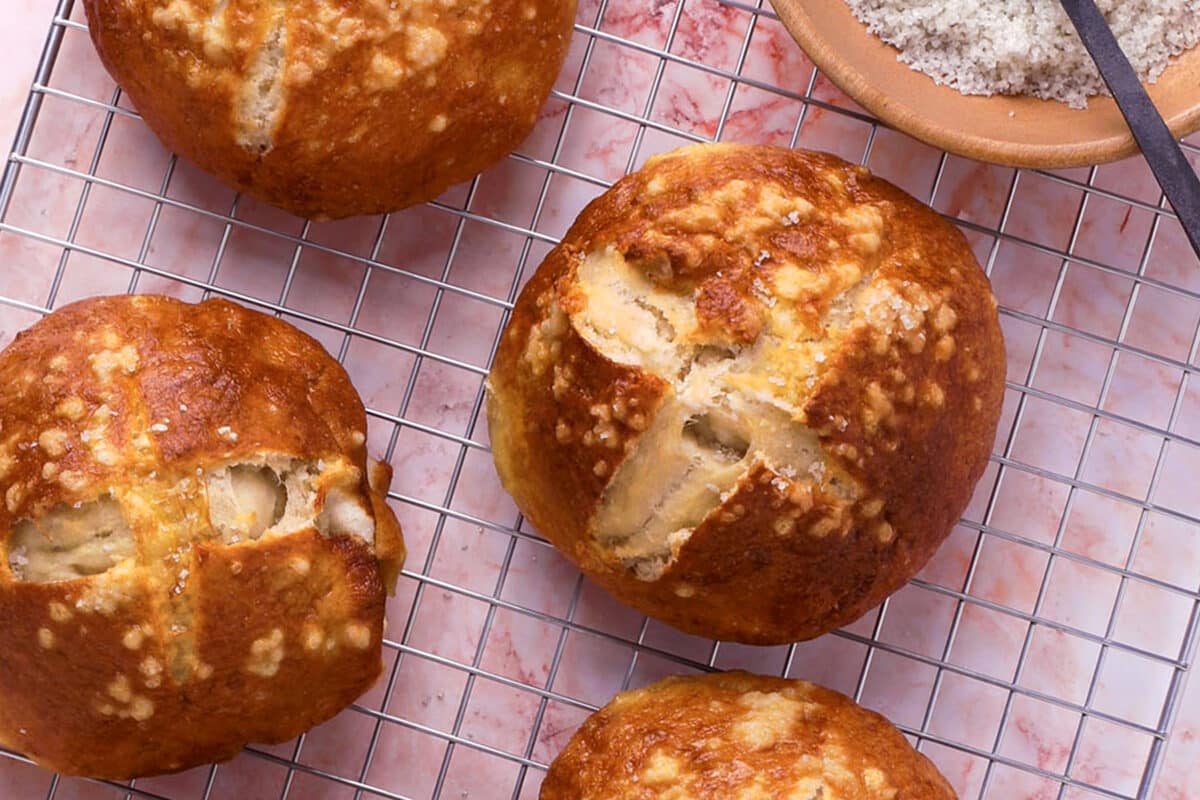
If you have ever loved a bakery pretzel roll but wished it held up as a real burger bun, this is the recipe you have been waiting for. Think of these as the richer, chewier cousin of my Soft Homemade Hamburger Buns, and if you are still building confidence with yeast, my Ultimate Guide to Homemade Bread walks you through the fundamentals. Stack them with a simple smash patty or reach for something bolder like my Bloody Mary Burgers for a cookout that gets remembered.
In This Post
Why You’ll Love these Pretzel Burger Buns
These buns hit the sweet spot between a soft pretzel and a proper burger bun. The outside has a burnished, chewy crust with flecks of coarse salt, while the inside stays tender and light enough to bite through cleanly. They are budget-friendly, made almost entirely from ingredients you already have, and the active work is only about 15 minutes. Best of all, they solve the problem every homemade bun struggles with: they are sturdy enough to stand up to a loaded burger without collapsing.
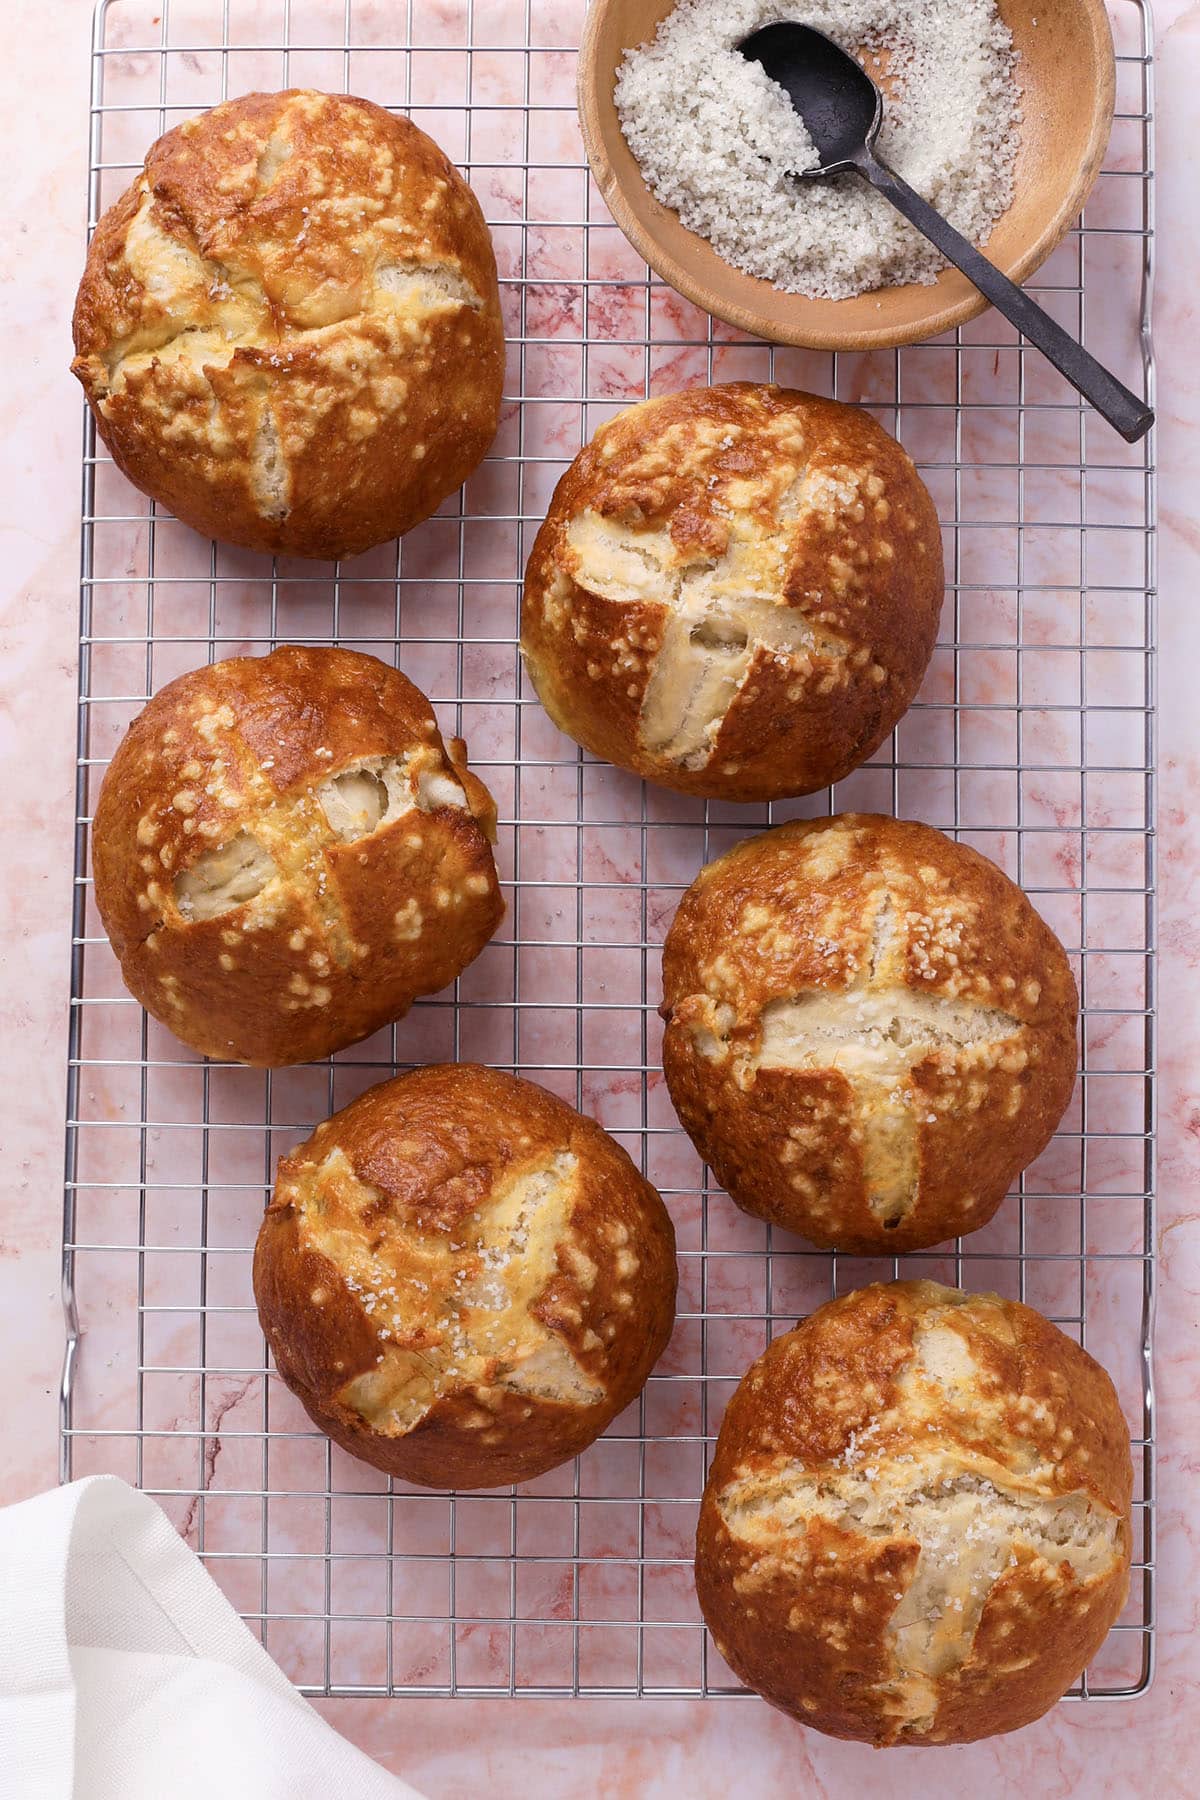
Heather’s Expert Tips for the Best Easy Homemade Pretzel Burger Buns
Drawing from 20 years of recipe development and my time co-founding a spice company, here’s what makes this recipe worth making exactly as written.
- Reach for bread flour, not all-purpose: The higher protein content is what gives these buns their signature chew and the structure to hold a heavy patty. All-purpose will work in a pinch, but you will lose some of that satisfying pull.
- Never skip the baking soda bath: That quick alkaline dip is the single step that separates a pretzel bun from a plain roll. It sets the crust and delivers the classic pretzel flavor, the same principle at work in my Easy Cheesy Garlic Bagels.
- Brush on the egg wash: Many pretzel bun recipes skip it, and it shows. The beaten egg gives you that glossy, deep-brown finish and, just as importantly, gives the coarse salt something to grip so it stays put instead of sliding off.
- Bake to color, not just to the timer: You want a deep mahogany brown, not pale gold. During my years co-founding Spiceology, I learned to trust my eyes over the clock, and the same rule applies here. Pull them when the bottoms sound hollow with a tap.
- Salt with a light, deliberate hand: Coarse grey sea salt or pretzel salt is right; fine table salt will dissolve and turn the tops sharp. A pinch per bun is plenty.
Maillard Reaction
The dark, glossy crust on a pretzel bun is a textbook example of the Maillard reaction, the chemistry between amino acids and sugars that produces browning and hundreds of new flavor compounds. What makes pretzel buns special is the baking soda bath. Dipping the shaped dough in alkaline water raises the pH of the surface, and a higher surface pH dramatically accelerates the Maillard reaction in the oven. That is why these buns brown so much faster and deeper than an untreated roll, and why they taste distinctly toasty rather than simply baked.
The egg wash adds a second layer to the effect. The proteins and sugars in the beaten egg brown alongside the alkalized surface, deepening the color into that signature pretzel mahogany and adding shine. This is the reason these buns look bakery-made and carry so much more flavor in the crust than the crumb alone could ever provide. Get the bath and the wash right and the oven does the rest.
Equipment Needed
- Stand mixer with a dough hook (or a large bowl and a little arm work)
- Large pot for the baking soda bath
- Slotted spoon for lifting the buns out of the water
- Rimmed baking sheet
- Parchment paper
- Pastry brush for the egg wash
- Sharp paring knife or bench scraper for slashing and dividing

Ingredients for Homemade Pretzel Buns
- Warm Water: Activates the yeast effectively.
- Milk: Adds richness and softness to the dough.
- Unsalted Butter: Provides flavor and tenderizes the dough.
- Granulated Sugar or Brown Sugar: Feeds the yeast and adds a hint of sweetness.
- Active Dry Yeast: Leavens the dough, making it rise.
- All-Purpose or Bread Flour: Forms the structure of the buns.
- Salt: Enhances flavor and strengthens the dough.
- Baking Soda: Essential for the boiling process to achieve the pretzel-like crust.
- Egg or Egg Yolk: Combined with water for an egg wash, giving the buns a glossy finish.
- Coarse Sea Salt or Pretzel Salt: For sprinkling on top, adding flavor and texture.
Find the full printable recipe card with exact measurements and step-by-step instructions below.
Recipe Variations & Substitutions
- Everything seasoning: Swap the grey salt for everything bagel seasoning, or use a mix of both, for a savory, garlicky top.
- Slider or big-burger sizing: Divide the dough into 12 pieces for sliders or 6 pieces for oversized quarter-pound burgers instead of the standard 8. Just adjust the bake time up or down a few minutes.
- Instant yeast: Substitute instant yeast one-for-one and skip the separate proofing step, mixing it straight into the flour.
- Cheddar and jalapeno: Knead in a half cup of shredded sharp cheddar and a couple tablespoons of diced pickled jalapeno at the end of mixing for a spicy, cheesy bun.
- Partial whole wheat: Replace up to one cup of the bread flour with white whole wheat for a nuttier, heartier bun without losing too much softness.
How to Store, Freeze, and Reheat
To keep your pretzel burger buns fresh and delicious:
- Room temperature: Store cooled buns in an airtight container at room temperature for up to 2 days. The coarse salt topping will slowly draw moisture, so eat them sooner rather than later for the crispest crust.
- Skip the fridge: Refrigeration dries out the crumb and turns these tough. Keep them on the counter or freeze them instead.
- Freeze them the right way: Yes, these freeze beautifully if you do it correctly. Cool the buns completely, leave the salt topping off (salt pulls moisture and dissolves in the freezer), wrap each bun tightly, and store in a freezer bag for up to 3 months.
- Reheat from frozen: Warm frozen buns in a 300 to 325 degree oven for 8 to 10 minutes. Brush the tops with a little melted butter and add fresh coarse salt as they come out to bring the crust and shine right back.
- Make the dough ahead: After the first rise, refrigerate the covered dough overnight. The slow cold ferment actually deepens the flavor, and you can shape and bake the next day.
Frequently Asked Questions
Yes, and they freeze well when you do it right. Cool them completely, leave off the salt topping since it dissolves in the freezer, wrap each bun tightly, and freeze for up to 3 months. Reheat in a low oven and add fresh salt as they come out.
Bitterness almost always comes from too much baking soda or leaving the buns in the bath too long. Measure the soda precisely, keep each bun in the boiling water to just 20 to 30 seconds per side, and do not skip the egg wash, which balances the flavor and gives a rounder, toastier finish.
Absolutely. Mix and knead the dough by hand on a lightly floured surface for about 7 to 8 minutes until it is smooth and springs back when pressed. It takes a little more effort but produces the same chewy, tender bun.
Bread flour has more protein, which builds the gluten structure that gives these buns their chew and lets them hold up to a heavy burger. All-purpose flour will work but the buns will be softer and less sturdy.
Anything from a classic smash patty to my Buffalo Chicken Burgers or a batch of Pulled Pork Sliders. Round out the plate with a scoop of Classic Potato Salad and you have a full cookout.
More Bread Recipes to Try
- Walnut Levain Bread
- Cinnamon Raisin Bread
- Buttermilk Cornbread
- Chocolate Banana Bread
- No-Knead Bread
Pretzel Burger Buns Recipe


Recommended Tools
Ingredients
- 1 ½ cups warm tap water
- 1 pkg active dry yeast
- 2 tsp granulated sugar
- 4 ½ cups bread flour
- 1 tsp kosher salt
- 4 tbsp salted butter, melted
- 1 tsp olive oil
- 2 quarts water
- ¼ cup baking soda
- 1 large egg, lightly beaten
- 2 tsp grey sea salt, or pretzel salt

Instructions
- In a small bowl, combine warm water, yeast, and sugar. Let it sit for 5-10 minutes until foamy.
- In a large mixing bowl (or stand mixer with a dough hook), combine flour and salt. Pour in the yeast mixture and melted butter. Mix until the dough no longer sticks to the sides of the bowl.
- Place the dough in a lightly greased bowl, cover with a damp towel, and let it rise in a warm draft-free spot for about 1 hour or until doubled in size.
- Punch down the dough and divide it into 8 equal pieces. Roll each into a smooth ball, then flatten slightly into a bun shape. Place them on a parchment-lined baking sheet, cover, and let rise for another 30 minutes.
- Preheat oven to 425°F.
- In a large pot, bring water to a boil. Add the baking soda. Carefully drop each bun into the boiling water for 20-30 seconds per side (this gives them that classic pretzel crust). Use a slotted spoon to transfer them back to the baking sheet. Repeat with remaining dough balls.
- Brush each bun with beaten egg and sprinkle with grey salt (or coarse pretzel salt). Use a sharp knife to slash an "X" on top. Bake for 18-22 minutes until deep golden brown and the buns sound hollow when thumped on the bottom.
- Let the buns cool before slicing and loading them up with your favorite burger fixings.
Save this Recipe!
Easily save this recipe to your own recipe collection box and come back to it anytime you want!
Nutrition
*Nutritional information is not guaranteed to be accurate.
Did you try this recipe?
Please Leave a Review & Star Rating!This homemade pretzel burger bun recipe was originally published on April 14th, 2025. It has recently been updated with new photography, tips, freezing, and storing instructions.

Hi! I’m Heather
I’m Heather, a recipe developer and content creator based in Vancouver, Washington. I started Farmgirl Gourmet in 2006 because I believed weeknight dinners shouldn’t be boring and gourmet shouldn’t mean complicated. I’m also the co-founder of Spiceology, so safe to say I think about food for a living. Stick around for recipes that actually make it into your regular rotation.
This is a recipe I have come back to time and time again. It works every single time! Thank you for the recipe!
All I can say “They as good as they look.” Yum
I really love this recipe and hope you will too!
Would all purpose flour be a no no?
I just stumbled across these on pinterest. I always get so excited when we’re out to eat and sliders/burgers are served on a pretzel bun. But at home, I always chicken out and buy pre-made buns for our meals. I am going to have to try these out next time, they look amazing!!
Anyone ever try making the dough in a bread maker?
I made mine in the bread machine on the dough setting. Followed the recipe exactly. For my first try at pretzels, the turned out well. I’ll try them again.
I don’t have a mixer with a dough hook attachment. Can you tell me how I might alter the recipe to accommodate this? Thanks!
Obsessed!!! I made this last weekend and have another round about to go into the water. I’ve always wanted to try pretzels and now I am no longer afraid. 🙂
Much love!
So glad you like them. They are my faves too!! I need to make them again very soon! Thanks for commenting.
When making gravy always remember to use a cold liquid if your roux is hot. If I’m using freshly made stock, I make my roux ahead of time & give it a chance to cool. This will ensure a nice smooth gravy. As soon as roux & your liquid start boiling, STIR, STIR, STIR! Wire wisk is good for that. When preparing a roux also remember that a little goes a long way. Too much roux & you’ll end up w/ enough gravy for the whole neighborhood. Unless thats what you want!! Thanks for pretzle roll recipe. Anxious to try it.
Would they freeze well? Thought about making them (a lot) for a party. Thank you.
I believe they would. Sorry for the delay – I was off camping with limited internet access. Let me know how it goes!!
Wow!! Just made a batch of these and they are fabulous!!! I have been intimidated by pretzels as well, but this was super easy! We go through tons of pretzel rolls in my house, now i can make them:) Thank you so much!!
I made these and they are awesome. But mine stuck really bad to the parchment paper.
I wonder why Pam? How long did you boil the buns for? 30 secs per side? I didn’t have any sticking issues at all. 🙁 Sorry about that.
These are the cutest buns, they look incredible!
I want to reach in and grab one!!
there are 2 left Katrina…want me to send you one? 🙂
I am right there with you. Making pretzels has intimidated me too! I see so many recipes on Pinterest and love soft, homemade pretzels but just haven’t jumped in and tried them. I Love your step by step directions. These looks so yummy.
Mercy! Those are some gorgeous buns! Well, gorgeous slider buns! I can’t believe you get freaked by gravy! Being a southern girl, gravy is my middle name.
LOL – from now on I shall call you Gravy. 🙂
These are calling my name and I can’t wait to see what you made with them.
I can’t wait to share. The post goes live tomorrow. 🙂
These are so beautiful! Seriously. I love how easy this is. I die for pretzel buns, they are so amazing!
Thank you Stefanie. There are 2 left and I am seriously considering hoarding them somewhere no one can find them. 🙂 Although, I did that with chocolate bars on 4th of July and then forgot where I put them….until about a week ago when I located them. Too funny.
Completely understand. I have been rather “freaked out” or just plain scared to try pretzels myself too. They sound like they would be so hard to make. But your descriptions and pictures, the way you broke down the steps, make it look easy.Thanks 🙂 Yes summer time will be here a few months and I can’t wait to use this on grilled everything! Actually, these would be perfect for the salsa I just made & slider burgers! 🙂 Kudos to another great recipe blog!
thanks for the sweet comment. I think some recipes just need a pictorial – others not so much. Bread always seems to freak people out, so seeing it step by step sure helps. I know it helps me. Thanks for commenting!! ~Heather
Pretzel buns are my weakness and ps I totally stink at making gravy!
That makes me feel better. We should start a Gravy Support Group Paula! 🙂 Thanks for popping in and commenting. We need to catch up soon! xo
I love pretzel bread and this recipe looks so easy! Can’t wait to give it a try!
Let me know how you like it Jessica.
I’ve always wanted to make these!! So pretty!
Do it Anna. So much easier than I expected. Now I want to make pretzels…maybe for Superbowl. 🙂
I am now craving a pretzel:).
they are calling my name from downstairs right now. I had them for lunch & dinner yesterday….so I’m a bit carbed out! 🙂 (I was recipe testing)
I adore pretzel buns!
I am now a huge fan too Erin. Who knew they were so great? Not this girl!
So glad your frack is no longer freaked. You have some amazing looking buns there, Heather 😉
lol Shelby, you cheeky monkey. 😉 Thanks for commenting.
I could think of 101 things to stuff in these tasty rolls!