


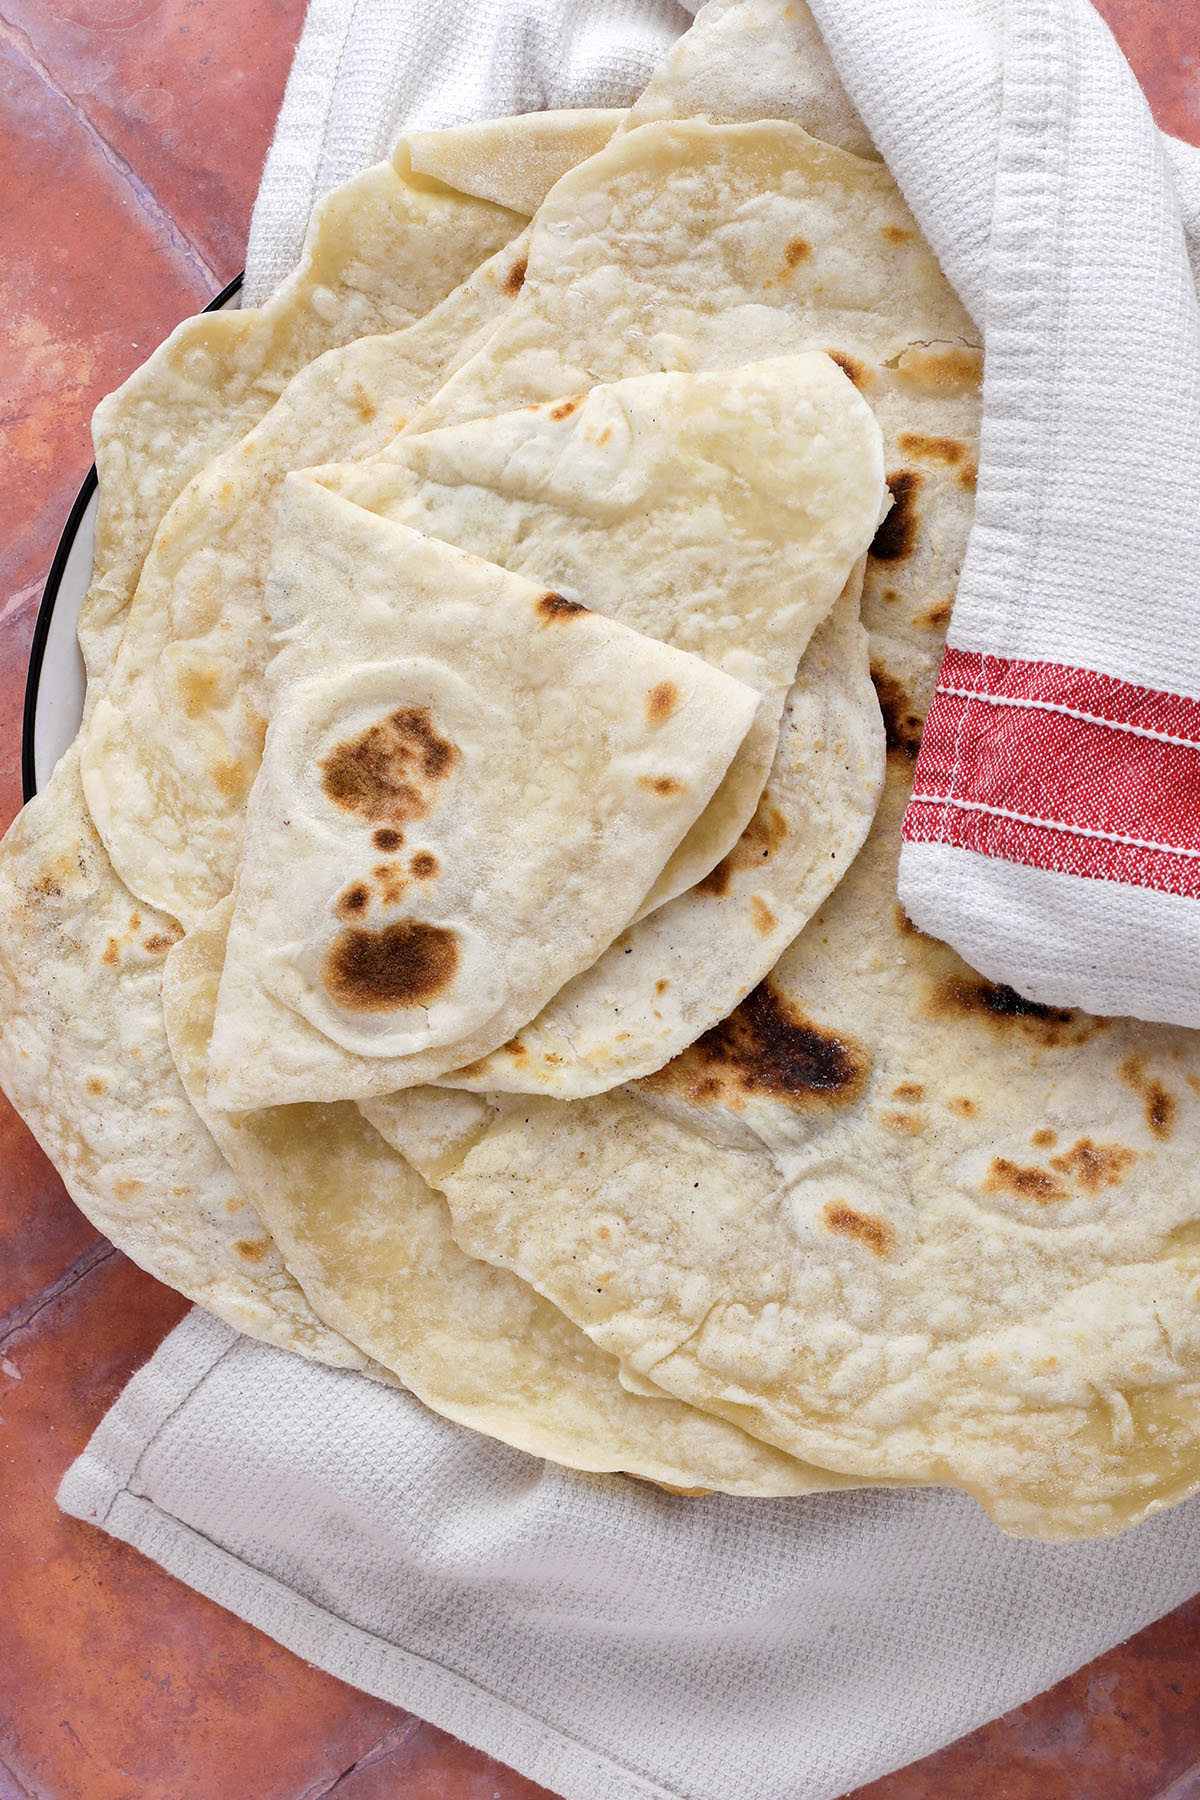


Homemade flour tortillas will ruin you for the store-bought kind, and honestly, good riddance. With five pantry staples and under an hour, you get soft, chewy, blistered tortillas that smell so good coming off the skillet the first batch rarely survives to taco night. No fancy equipment, no special flour, no excuses.
Once you have a warm stack on the counter, the possibilities get dangerous. Pile them with Cheesy Skillet Chicken Chilaquiles, wrap them around Chickpea Tacos with Cabbage Apple Slaw, or keep it simple with butter and a drizzle of honey. This is one of those from-scratch basics, like Homemade Ricotta Cheese, that makes everything else you cook taste better.
In This Post
Why This Works
Hot tap water is the quiet hero of this recipe. It hydrates the flour faster and starts relaxing the gluten right away, which gives you a smooth, elastic dough that rolls thin without fighting back. Combine that with a proper 30 to 40 minute rest and the dough practically rolls itself.
Oil instead of lard keeps things simple and pantry-friendly. It coats the flour before the water goes in, which shortens some of the gluten strands and keeps the tortillas tender instead of tough. A little baking powder adds just enough lift for that soft, puffy texture without turning them into flatbread.
Heather’s Recipe Notes
Drawing from 20 years of recipe development and my time co-founding a spice company, here’s what makes this recipe worth making exactly as written.
- Resist the urge to skip the rest. A rushed dough snaps back when you roll it and cooks up stiff. Thirty minutes under a damp towel is non-negotiable.
- Roll the tortillas thinner than you think you need to. They puff and thicken slightly in the pan, so a nearly translucent round gives you that perfect soft chew.
- Your skillet is ready when a drop of water sizzles and evaporates instantly. Too cool and the tortillas dry out before they brown, too hot and they scorch before they cook through.
- Keep the finished tortillas wrapped in a clean kitchen towel as you go. The trapped steam keeps them soft and pliable while the rest of the batch cooks.
- As a spice company co-founder, I can’t resist a flavored batch. A pinch of smoked paprika or garlic powder kneaded into the dough turns these into something special for fajita night.
Maillard Reaction
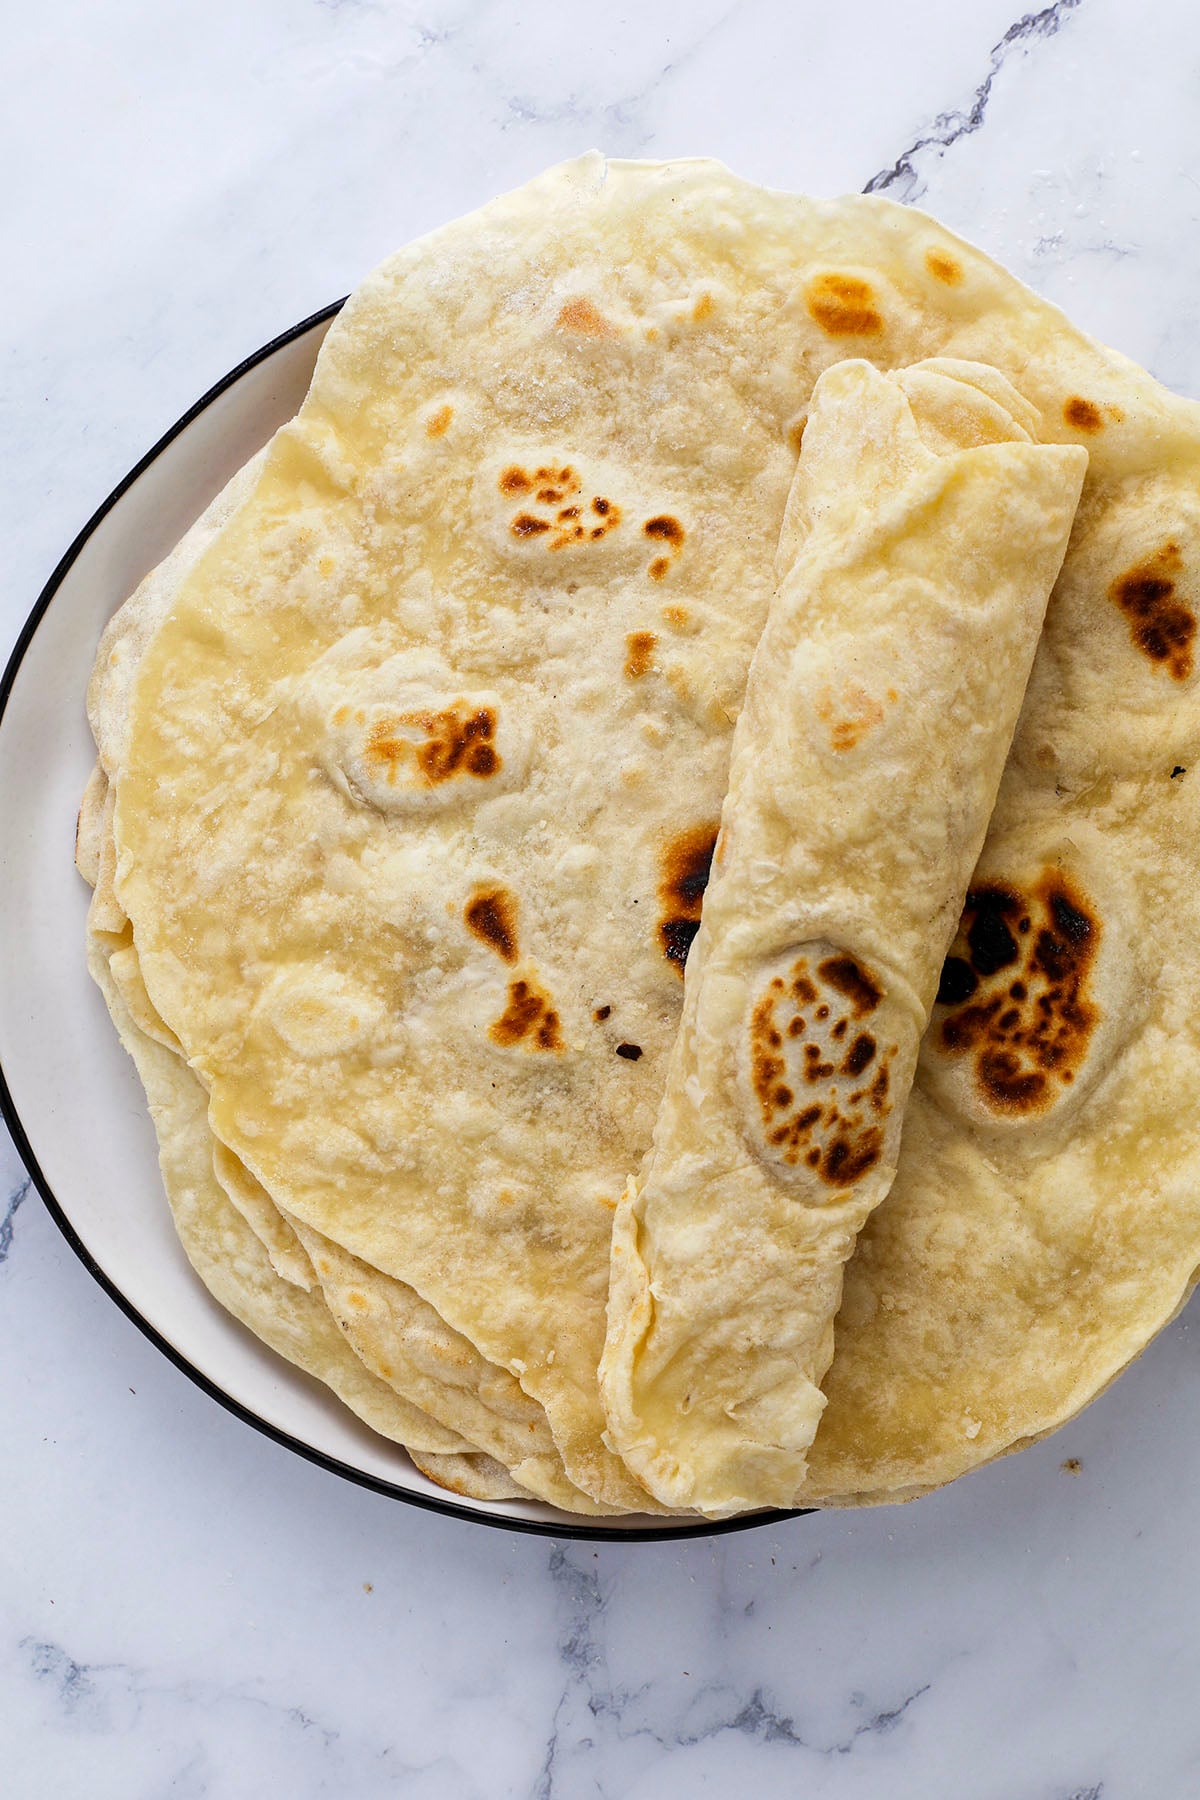
Those gorgeous golden brown spots that bubble up on each tortilla are the Maillard reaction doing its thing. When the dough hits a hot, dry skillet, the proteins and natural sugars in the flour react and create hundreds of new flavor compounds. That’s why a fresh tortilla tastes toasty and slightly nutty instead of like plain raw dough.
This is also why pan temperature matters so much. Medium-high heat gives the surface time to brown in those signature spots while the inside steams and stays soft. If the pan is too cool, you’ll get pale, cardboard-stiff tortillas with none of that toasted flavor. Trust the brown spots. They’re flavor, not a flaw.
Ingredients in Homemade Flour Tortillas
- All-purpose flour – regular or whole wheat
- Baking powder – make sure you check your expiration date
- Kosher salt – if using table salt, decrease amount by 1/2
- Vegetable oil – or use melted lard or melted butter
- Hot water – hot from the tap or water heated with a kettle or on the stove
Subs & Variations
- Flour – Swap in half whole wheat flour for a heartier, nuttier tortilla. Keep at least half all-purpose so they stay soft.
- Fat – Use lard or melted butter in place of vegetable oil for a richer, more traditional flavor.
- Seasoning – Knead in a pinch of garlic powder, smoked paprika, or dried herbs for flavored tortillas.
- Size – Roll 6-inch rounds for street-style tacos or 10-inch rounds for burritos and wraps.
- Griddle it – A flat cast-iron griddle lets you cook two at a time and gets you through the batch twice as fast.
Find the full printable recipe card with exact measurements and step-by-step instructions below.
How to Make Flour Tortillas from Scratch

In a medium bowl, add the all-purpose flour, baking powder, and kosher salt. Stir to combine.

Add the vegetable oil and stir with a wooden spoon until no longer wet and combined.

Use your fingers to break up and large clumps until the mixture looks like coarse meal.

Add hot water and stir well to combine. The dough will be craggy.

Make sure all of the flour is incorporated. Don’t overmix.
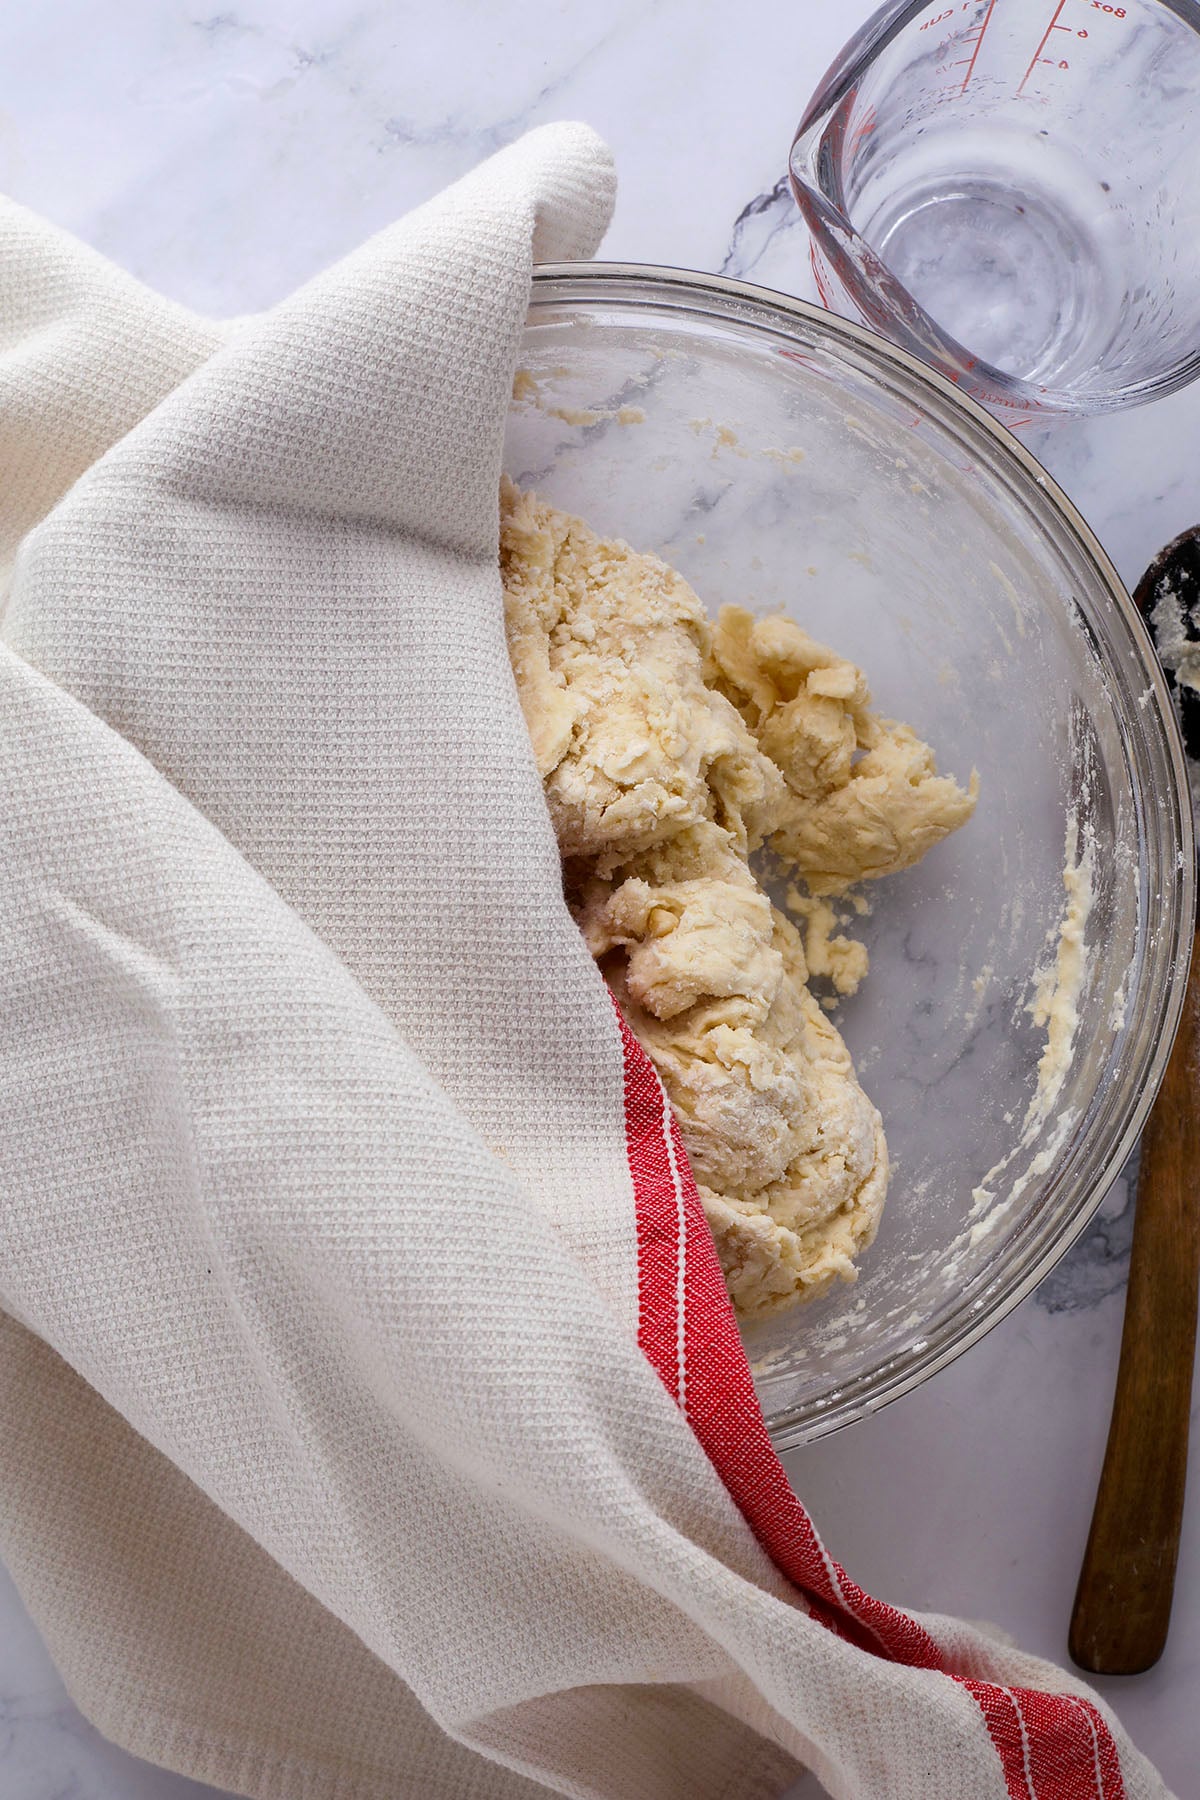
Cover with a towel or plastic wrap and rest 30 minutes.

Form the dough into a ball on a lightly floured work surface.

Cut the dough ball into 12 equal sized pieces. Roll into balls and return to the bowl and cover.
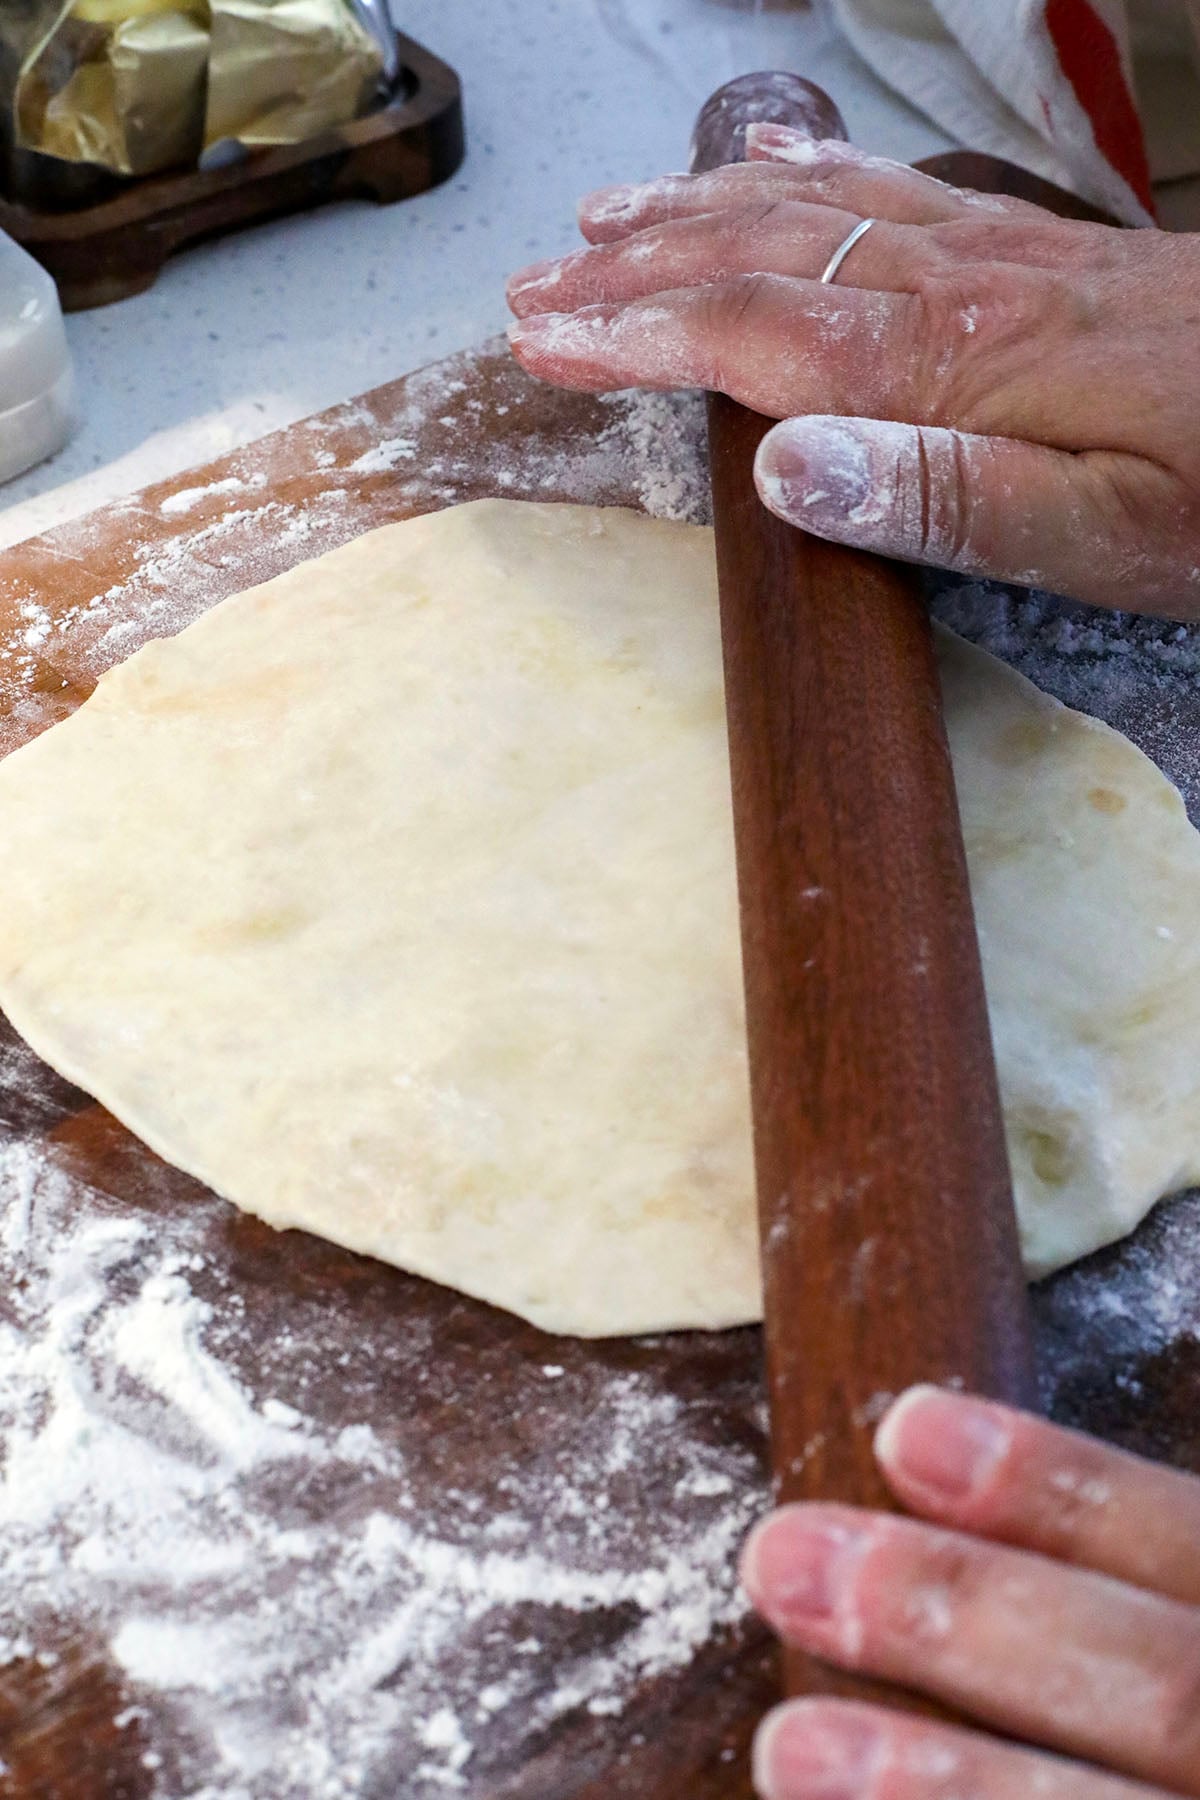
Roll out the dough ball very thin. They will puff up when cooked.

Add to a hot dry skillet or griddle. Cook until it starts to puff up a little. Flip over.
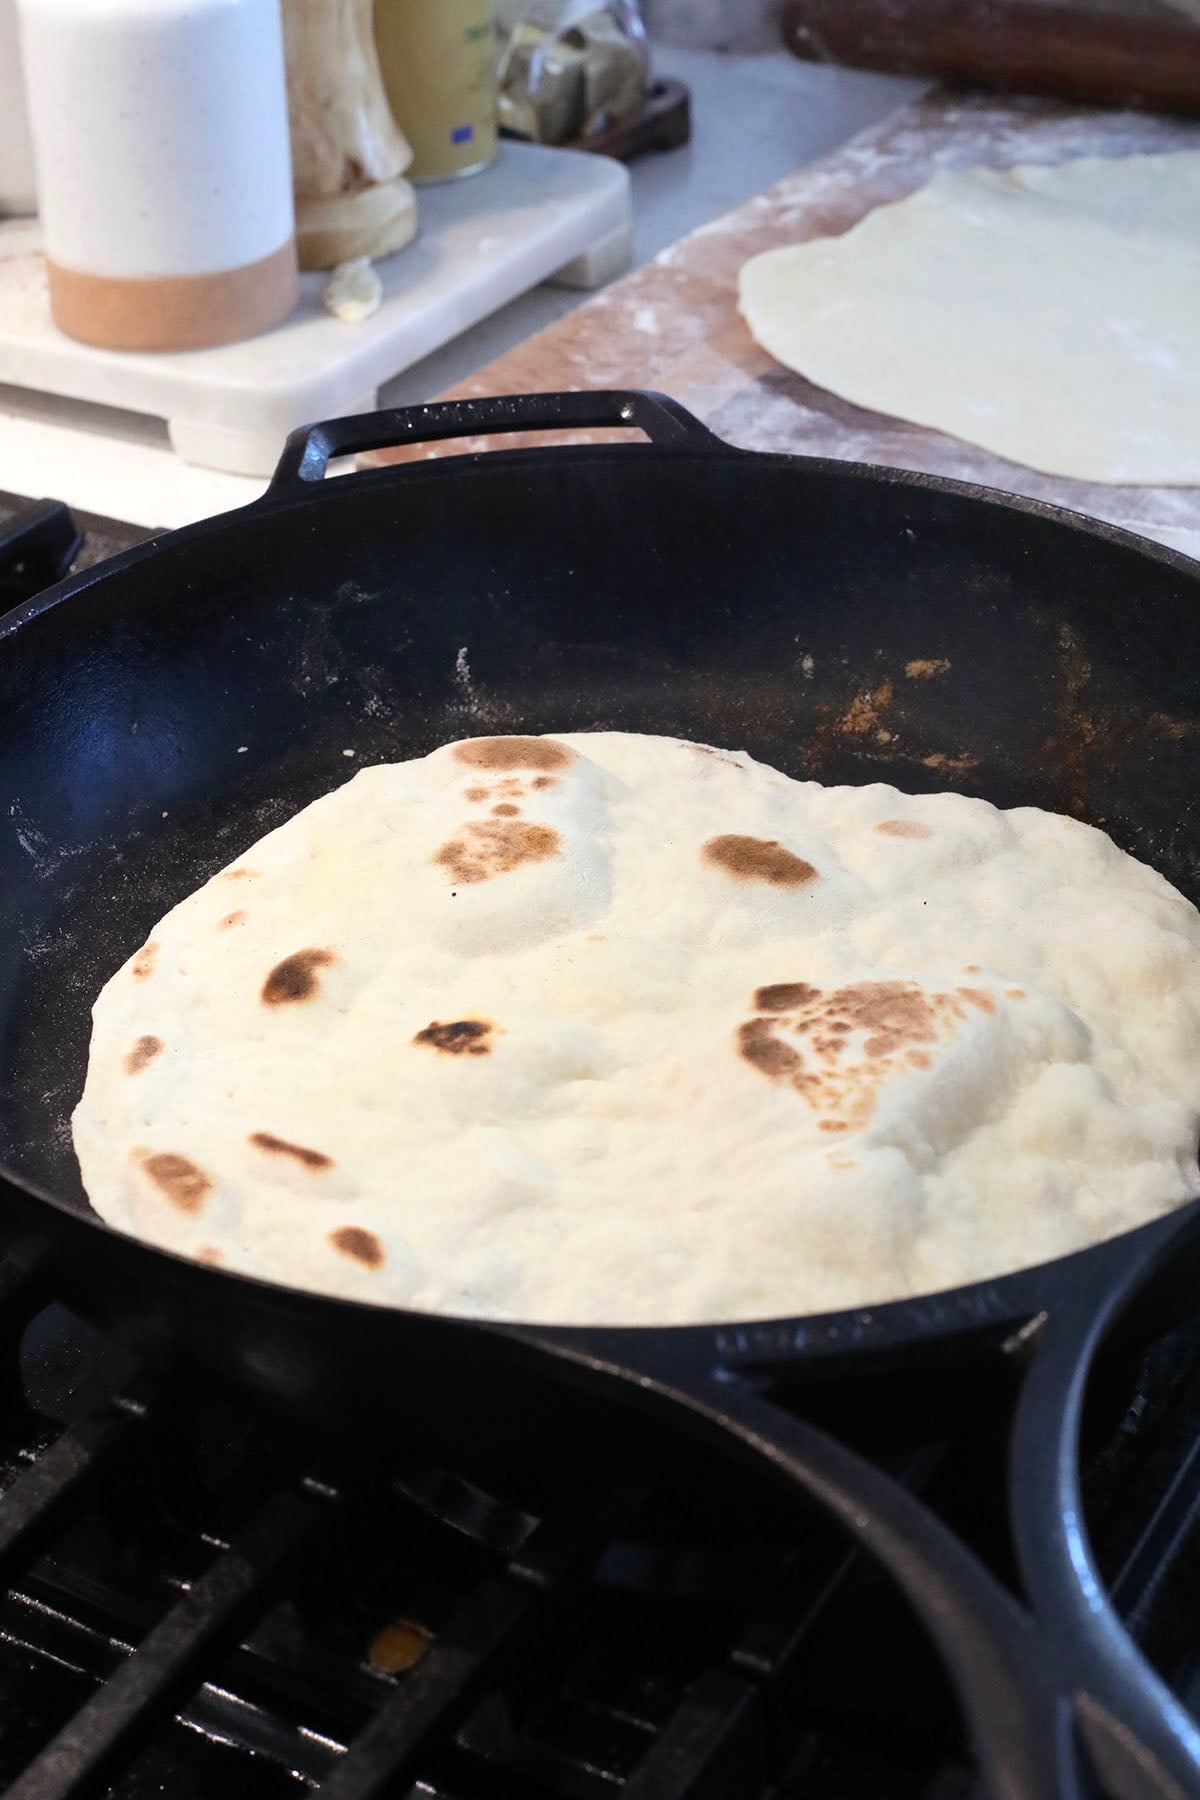
Continue to cook and flip until lightly browned and cooked through.
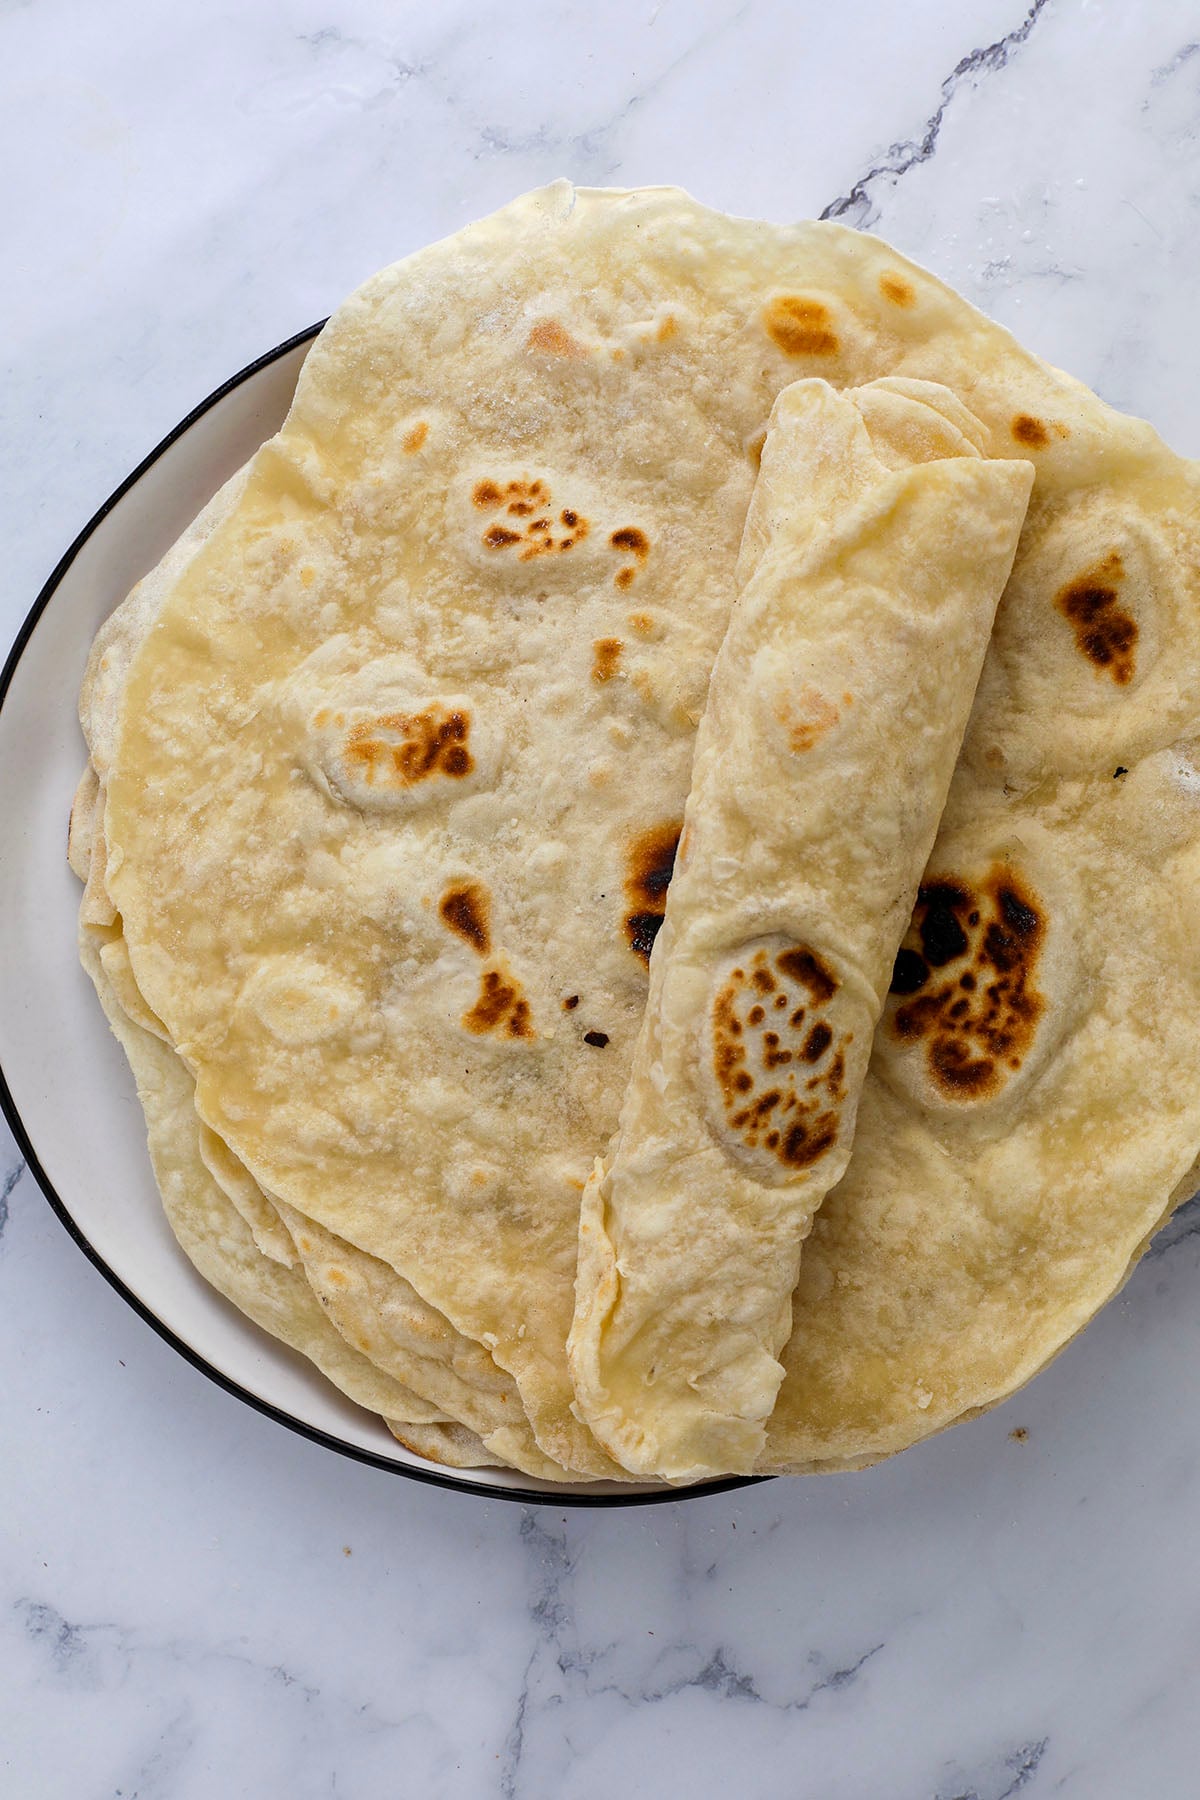
Remove to a plate and continue with the remaining dough balls. See tips for storing below.
Tips for Storing
- Store cooled tortillas in an airtight container or zip-top bag at room temperature for up to 2 days.
- Refrigerate for up to 1 week, wrapped in foil or plastic wrap so they don’t dry out.
- Freeze in stacks with parchment paper between each tortilla for up to 3 months.
- Reheat frozen tortillas straight from the freezer in a hot, dry skillet for about 30 seconds per side.
- To revive fridge-cold tortillas, warm them in a dry skillet or wrap in a damp paper towel and microwave for 15 to 20 seconds.

Frequently Asked Questions
The dough was most likely too dry or under-rested. Use hot water, add it gradually until the dough is soft and slightly tacky, and give it a full 30 to 40 minute rest.
Yes. Use the dough hook on low speed for 3 to 4 minutes until the dough is smooth and elastic, then rest it as directed.
Absolutely. Resting relaxes the gluten so the tortillas roll thin without springing back and stay tender after cooking.
Practice helps, but a tortilla press is the shortcut. Rotate the dough a quarter turn between each pass of the rolling pin and you’ll get closer every time.
A cast-iron skillet or flat griddle is ideal. Both hold steady, even heat, which is what gives you those golden brown spots.
Yes. Wrap the rested dough tightly and refrigerate for up to 24 hours. Let it come back to room temperature before rolling.
More Recipes We Love
- Cheesy Skillet Chicken Chilaquiles
- Chickpea Tacos
- Homemade Sriracha Sauce
- California Roll Breakfast Sushi
- Homemade Ricotta Cheese
- Pumpkin Spice Sherry Bundt Cake
Homemade Flour Tortillas Recipe


Recommended Tools
Ingredients
- 3 cups all-purpose flour
- ½ tsp baking powder
- 1 tsp kosher salt
- ⅓ cup vegetable oil, or canola
- 1 cup hot tap water

Instructions
- In a medium bowl add the flour, baking powder and salt and whisk to combine.
- Add the oil and use your fingers to incorporate into the flour mixture. It should resemble crumbly meal. (you could also use a food processor)
- Add the hot tap water and stir to combine. Once the dough ball comes together, place a piece of plastic wrap over the bowl and allow to rest for 30-40 minutes.
- Divide into 12 equal balls.
- Heat a nonstick skillet over high heat. Roll out 1 ball at a time to a circle shape. Add to the hot skillet and cook for 1 minute, flip and cook for another minute. Remove to a plate and repeat with remaining dough. Serve warm.
Save this Recipe!
Easily save this recipe to your own recipe collection box and come back to it anytime you want!
Notes
Nutrition
*Nutritional information is not guaranteed to be accurate.
Did you try this recipe?
Please Leave a Review & Star Rating!
This homemade flour tortillas recipe was originally published on August 15th, 2011. It has recently been updated with new photography, step-by-step collages, tips, and storing instructions. The recipe was slightly modified to include optional ingredients to vegetable oil, each work well.

Hi! I’m Heather
I’m Heather, a recipe developer and content creator based in Vancouver, Washington. I started Farmgirl Gourmet in 2006 because I believed weeknight dinners shouldn’t be boring and gourmet shouldn’t mean complicated. I’m also the co-founder of Spiceology, so safe to say I think about food for a living. Stick around for recipes that actually make it into your regular rotation.
I really love this recipe and hope you will too!
Have you made this with other flours or a combination of flours? Wonder if I could do half corn? Making these this week for sure!
I cut recipe in half and use 1/2 cup w/w and 1 cup Einkorn wheat. I can cook a few and leave the rest in frig (covered) and use the next day !! I cook in iron skillet with no oil and they are fabulous !!!!!
Yum this looks good.:D
Man! So mad I didn’t see this until today….we just had tacos last night…
Next time for sure!!
Thanks to you all for your comments. They really are delectable. Soft and perfect. Now that I’ve said that I think I’ll go have one. 🙂 I hope you let me know what you thought after making them.
xoxo – Heather
Great post. I can’t wait to try these
Inspired post! Bubbly and delectable right off the griddle! I have wanted to make tortillas for a while, but just haven’t. Homemade are so much better than from the store. Absolutely on my list to make soon.
Oh wow, these look awesome. I know what we’re doing when I reach WA! Taco Night! 🙂
Wow, these look great!! I would love to attempt to make my own, I bet the flavor is amazing! And chickpea tacos sound so good!
I make my own corn tortillas ever since I went to Yucatan and got hooked:) Flour tortillas were on my next list of projects, so I am glad that you have this recipe up. I am in Serbia, taking care of my mother, and tortillas are almost impossible to find. The ingredients, on the other hand, are available! Looking forward to trying them!
These really remind me of Chapatis I used to make ALL the time when my son was growing up. We used to cook a lot of “Indian” inspired foods & would use the chapatis as a “side” bread or to wrap some yummy, savory beans, hunks of tofu with Indian spices (I’m still holding on jealously to some spice blend packets from Culpepper the Herbalist (I can no longer get them online, so I have to wait ’til I visit England to get them!), yogurt & veggies up like an Indian wrap. I got my recipe from “Laurel’s Kitchen.”
Similar to this recipe (BTW, the cookbook this recipe comes from is my absolute FAVORITE for cooking Indian food — “The Bombay Palace Cookbook” by Stendhal)
Chapatis #3
breads, indian
1 1/2 cup flour, unbleached
1/2 cup flour, whole wheat
1 teaspoon salt
3 tablespoon ghee
1/2 cup water
Mix flours, salt, and butter and add just enough water to make a firm dough, somewhat like a biscuit dough. Knead for 10-15 minutes – the more the dough is kneaded, the lighter the bread will be. Shape the dough into a ball, cover with a sheet of plastic and let it rest for at least 1 hour. If left to rest overnight in the refrigerator, the finished bread will be even lighter. When ready to bake, take a small piece of dough about the size of a golf ball, or a bit smaller. On a lightly floured board, roll the dough into a thin circle, about 5 inches in diameter. Repeat with all the dough. Heat a griddle or heavy-bottomed iron skillet until it is very hot (you will notice the smoke rising from it). Place the rolled out chapati on the griddle and let it cook for 2-3 minutes, depending on how thin you have rolled it. Using a pair of kitchen tongs, you can lift the chapati to see if the underside has turned a golden brown. Flip, and cook the other side about 1 minute. As they are cooked, store the chapatis on a towel in a warm covered container until ready to serve. Serve as soon as the last chapati is baked. NOTE: In India breads sometimes are baked in the fiery clay tandoor, where they develop brown spots and bubbles. To achieve a similar effect at home, you can use tongs to hold each chapati over a hot gas flame until it puffs like a little balloon. The chapati will collapse as it cools. The Bombay Palace Cookbook Stendhal per Ellen Cleary
Yield: 10 servings
Can not what to try them!
This comment has been removed by the author.
They sound super easy and tasty! It reminds me of making pie crust as far as working with it.
They were awesome <==== husband of this food blogger!!!